
I’d love to help you plan your Mercedes Sprinter high top long wheelbase conversion! This is one of the best base vehicles out there—spacious, reliable, and highly customizable. Let’s walk through the entire van build planning process step-by-step to get you rolling with confidence.
Want to start our own build check out our Van Build Buddy
🧭 STEP 1: Define Your Goals
Start by answering a few key questions:
-
How many people will sleep in the van?
-
What climate(s) will you be traveling in? (e.g., cold, hot, humid)
-
Full-time or part-time use?
-
Will you be off-grid or mostly on campgrounds?
-
Must-have features? (Toilet, shower, AC, large bed, workspace, etc.)
🗂️ STEP 2: Layout Planning
With a long wheelbase Sprinter, you have ~14 feet of usable interior length. Common layout zones:
-
Bed (fixed, convertible, or platform with garage underneath)
-
Kitchen (sink, stove, fridge)
-
Seating/dinette (maybe convertible to a bed)
-
Toilet/shower (wet bath, pull-out shower, or cassette toilet)
-
Storage (overhead, under-bed, cabinets)
📐 Tools:
-
Grid paper + tape measure for old-school planning
🧱 STEP 3: Insulation, Sound Deadening, and Ventilation
✅ Tasks:
-
Sound Deadening: e.g., Kilmat or Noico mats
-
Insulation: Sheep wool, Thinsulate, or XPS foam
-
Vapor Barrier: Not always necessary depending on insulation used
-
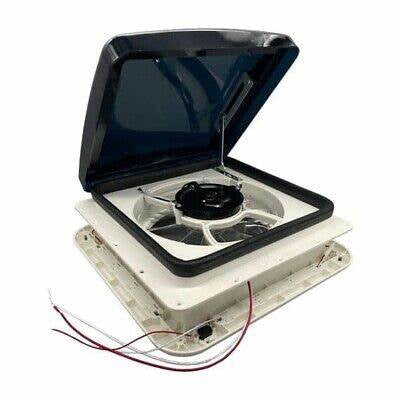
Ventilation: MaxxAir Fan or Dometic Fan + windows
🔧 Materials:
-
Kilmat 80 mil sound deadening
-
3M Thinsulate SM600L or Havelock Wool
-
MaxxAir Deluxe fan (with remote and rain cover)
🔌 STEP 4: Electrical System
Decide your power budget:
-
List appliances (fridge, lights, fans, outlets, etc.)
-
Estimate daily watt-hours
-
Size your battery and solar accordingly
Recommended Setup (for off-grid use):
-
200–400Ah LiFePO4 Battery
-
200–400W solar
-
Victron MPPT solar charge controller
-
DC-DC charger (e.g., Victron Orion-Tr Smart) for alternator charging
-
12V + 230V/110V distribution
🚰 STEP 5: Plumbing
Typical components:
-
Freshwater tank (20–40L inside, 60L+ under van)
-
Greywater tank (usually underslung)
-
Sink (manual or electric pump)
-
Optional: hot water heater (gas or electric), shower, cassette toilet
🔨 STEP 6: Carpentry and Interior Build
You'll want:
-
Wall/ceiling cladding (tongue & groove, ply, or PVC)
-
Flooring: Vinyl plank or sheet
-
Bed frame: Fixed or convertible
-
Cabinetry: Custom-built or IKEA/flat-pack options
📋 Legal and Safety Considerations (UK/Europe)
-
Insurance: Inform your insurer before modifying
-
Gas safety: Use certified gas-safe engineers if installing LPG
-
Weight: Stay under 3.5T (watch your build weight!)
-
MOT/Registration: Consider DVLA reclassification as a “motor caravan”
📦 Starter Parts List
| Category | Item | Link |
|---|---|---|
| Insulation | 3M Thinsulate SM600L | Buy on Amazon UK |
| Fan | MaxxAir Deluxe 7000K | Buy on Amazon UK |
| Power | Victron 100/30 MPPT | Buy from Victron Energy |
| Battery | Renogy 200Ah LiFePO4 | Buy from Renogy UK |
| Woodwork | Birch ply or lightweight ply | Local timber yard |
📽️ Tutorials to Watch
OUR BUILD REQUIREMENTS FROM THE QUESTIONS PROVIDED BY OUR VAN BUILD BUDDY
Check out our Van Build Buddy
🛠️ 1. Layout & Space Planning
Key Features:
-
Sleeping: Fixed full-size double bed.
-
Bathroom: Full-size shower and toilet (wet bath).
-
Workspace: Dedicated computer/workstation area.
-
Kitchen: Sink, fridge, air fryer.
-
Storage: Ample storage for tents, awning, and other gear.
-
Pet Accommodation: Space for a dog.
Layout Suggestion:
-
Rear: Fixed bed with garage storage underneath.
-
Mid-Section: Wet bath on one side; kitchen opposite.
-
Front: Swivel seats with a fold-out workstation.
Visual Inspiration:
⚡ 2. Electrical System (Budget: £2,000–£2,500)
Requirements:
-
Off-grid capability with shore power hookup.
-
Power for fridge, air fryer, TV, phone/laptop charging.
-
Ample hot water supply.
Recommended Components:
-
Battery: 200Ah–300Ah LiFePO₄ battery.
-
Solar Panels: 300W–400W.
-
Charge Controller: Victron MPPT 100/30.
-
Inverter: 2000W pure sine wave inverter.
-
DC-DC Charger: Victron Orion-Tr Smart 12/12-30A.
-
Shore Power: Victron Blue Smart IP22 Charger.
-
Monitoring: Victron BMV-712 Battery Monitor.
Estimated Costs:
-
Battery: £800–£1,000
-
Solar Panels: £300–£500
-
Charge Controller: £200
-
Inverter: £300–£400
-
DC-DC Charger: £200
-
Shore Power Charger: £150
-
Monitoring System: £150
Resources:
🚿 3. Plumbing & Water System (Budget: £1,000–£2,000)
Requirements:
-
Residential-style hot water shower.
-
Sink for washing up.
-
Large cold water storage (underfloor).
-
Smaller grey water tank with easy emptying.
Recommended Components:
-
Fresh Water Tank: 100L underfloor tank.
-
Grey Water Tank: 40L underfloor tank.
-
Water Heater: Truma Combi 4E (gas/electric) or similar.
-
Water Pump: Shurflo 12V pump with accumulator.
-
Shower & Sink Fixtures: Residential-style fittings.
Estimated Costs:
-
Water Tanks: £200–£300
-
Water Heater: £800–£1,000
-
Pump & Plumbing: £200–£300
-
Fixtures: £200–£400
Resources:
🧰 4. Interior Build (Budget: £1,000–£2,000)
Materials:
-
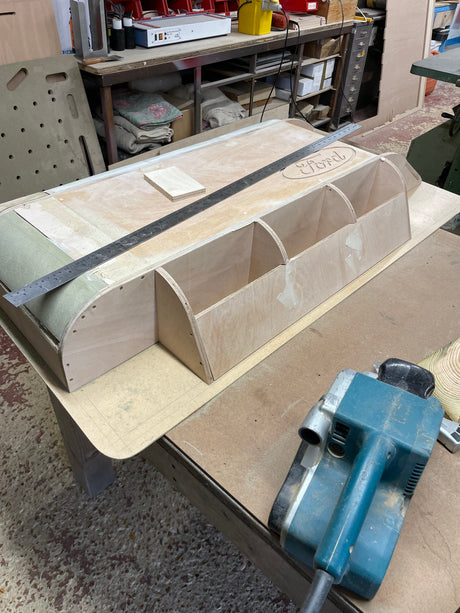
Cabinetry: CNC-cut melamine-faced boards or painted plywood.
-
Bed Frame: Custom steelwork.
-
Walls/Ceiling: Insulated panels with aesthetic finish.
-
Flooring: Vinyl or laminate.
Construction:
-
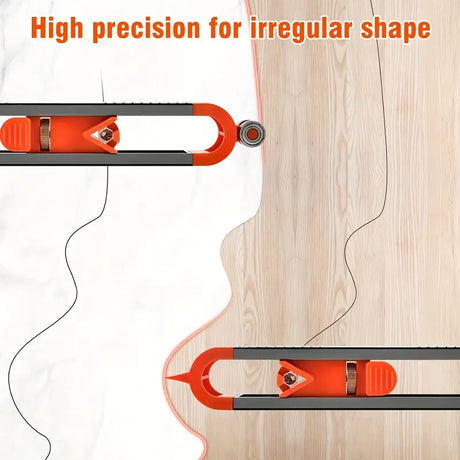
Utilize CNC services for precision-cut cabinetry.
-
Incorporate modular designs for flexibility and storage optimization.
Resources:
🧾 Summary
| Component | Estimated Cost |
|---|---|
| Electrical System | £2,000–£2,500 |
| Plumbing System | £1,000–£2,000 |
| Interior Build | £1,000–£2,000 |
| Total Estimate | £4,000–£6,500 |
Note: Costs are approximate and can vary based on specific choices and market prices.
💡 Need help planning your campervan build? Check out our latest post introducing Van Build Buddy — a powerful AI assistant that walks you through every step of your van conversion, from electrical setups to cabinetry, complete with parts lists and expert advice. It’s like having a pro builder in your pocket. Read more →
1 comment
a great help