To set up a basic off-grid electrical system for your campervan using Victron components, with the flexibility to upgrade batteries or add more solar panels later, here's a comprehensive guide tailored for UK-based DIY builders. This system integrates solar charging, alternator (DC-DC) charging, and shore power, providing a robust foundation for off-grid living.
🔌 System Overview
A modular off-grid system includes:
-
Battery Bank: Start with a single battery and expand as needed.
-
Solar Charging: Victron MPPT charge controller with solar panels.
-
Alternator Charging: Victron Orion-Tr Smart DC-DC charger.
-
Shore Power Charging: Victron Blue Smart IP22 charger.
-
Power Distribution: DC and optional AC distribution panels.
-
Battery Monitoring: Victron SmartShunt for real-time monitoring.
🧰 Starter System Components
1. Battery Bank (12V)
-
Initial Setup: 1x 100Ah LiFePO₄ battery (e.g., Victron, Battle Born).
-
Upgrade Path: Add additional batteries in parallel as needed.
-
Note: Ensure the battery has a built-in BMS or plan for an external BMS if expanding.Vanlife Outfitters
2. Solar Charging
-
Charge Controller: Victron SmartSolar MPPT 100/30.
-
Solar Panels: Start with 1x 200W monocrystalline panel; add more as needed.
-
Wiring: Use MC4 connectors and appropriate gauge cables.
-
Alternator Charging
5. Power Distribution
6. Battery Monitoring
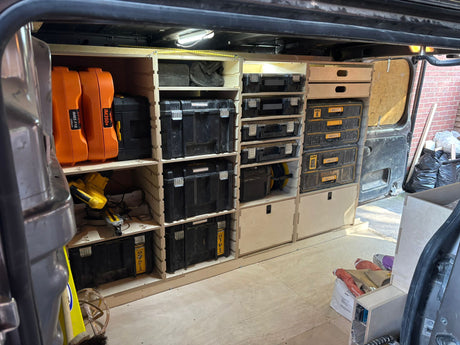
🛠️ Tools & Materials Needed
-
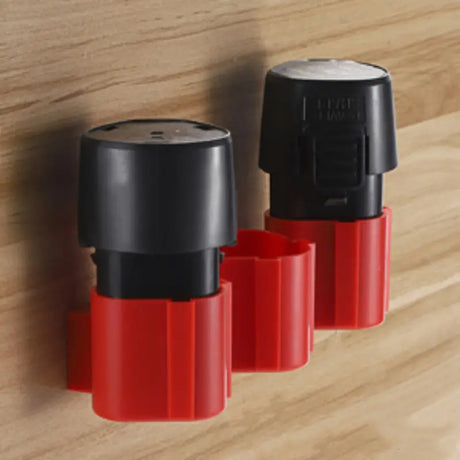
Wiring:
-
Appropriate gauge cables (e.g., 4 AWG or 2 AWG) for battery connections.
-
MC4 connectors for solar panel connections.
-
Fusing:
-
Connectors:
-
Tools:
-
Mounting:
-
Plywood board for mounting components.
-
Cable management accessories (e.g., zip ties, cable clips).YouTube+1YouTube+1
🛡️ Safety & Legal Considerations
-
Fusing: Install appropriate fuses close to the battery on all positive circuits.
-
Isolation: Include a main battery disconnect switch for safety.
-
Grounding: Ensure all components are properly grounded to the vehicle chassis.
-
Compliance: Adhere to UK electrical regulations and standards for vehicle conversions.
🔧 Modular Design Tips
📚 Tutorials & Resources
-
Victron Off-Grid System Installation: A step-by-step video guide on setting up a Victron-based off-grid system.
-
Victron Van Install: Detailed blog post with wiring diagrams and component layouts for a campervan setup.YouTubeVictron Energy
🧾 Parts List with Purchase Links
📄 Summary for PDF Export
Basic Off-Grid Campervan Electrical System with Victron Components
-
Battery Bank: Start with 1x 100Ah LiFePO₄; expandable.
-
Solar Charging: Victron SmartSolar MPPT 100/30 with 200W panel.
-
Alternator Charging: Victron Orion-Tr Smart 12/12-30A DC-DC charger.
-
Shore Power Charging: Victron Blue Smart IP22 12V/30A charger.
-
Power Distribution: 12V fuse block; optional AC panel for inverter.
-
Battery Monitoring: Victron SmartShunt 500A.
-
Safety: Proper fusing, main disconnect, and grounding.
-
Expandability: Designed for easy addition of batteries, solar panels, and inverter.
This gives us the basic install information. What we look at next is to make sure we have enough power for a ninja air fryer. See the changes plan out and the difference of requirements and needs.
A Ninja Air Fryer typically draws 1400W–1750W depending on the model. To safely run it off-grid, you’ll need an inverter capable of handling high AC loads.
✅ System Upgrade Needed for Air Fryer Use
To run a Ninja Air Fryer off your Victron-based system:
🔌 Add a Victron Inverter
🔋 Battery Bank Recommendation
-
Minimum: 200Ah LiFePO₄ (to avoid large voltage drop)
-
Why: A 1750W draw at 12V = ~145A (1750W ÷ 12V), which is intense for a single 100Ah battery
⚡ Inverter Cabling
-
Use 2/0 AWG wire from batteries to inverter
-
Include Class T fuse (e.g., 250A) near the battery
-
Ensure all terminals are tight and protected
⏱️ Usage Time Consideration
🛡️ Safety Tips
-
Always ventilate the cooking area well
-
Don’t use high-draw appliances when battery is low
-
Mount the inverter securely and close to the battery bank
🧾 Parts to Add
📄 Summary
-
Yes, your system can support a Ninja Air Fryer with the addition of:
-
This setup can handle short-term cooking loads, especially with good solar or shore power for recharging.
- For longer term cooking loads we would need to look at changing multiple factors, I’ll look to do this in a separate blog post.
Above we have the link to the following this is purely for easy reading.
🔌 System Upgrade Components & Pricing
| Component |
Description |
Price (GBP) |
Purchase Link |
| Victron Phoenix Smart Inverter 12/2000 |
2000W pure sine wave inverter suitable for high-power appliances like air fryers. |
£559.99 |
Amazon.co.uk |
| Victron Energy Lithium Battery Smart 12.8V 100Ah |
High-quality LiFePO₄ battery with built-in Bluetooth for monitoring. |
£610.00 |
Offgrid Power Solutions |
| Blue Sea 5502100 Class T Fuse Block with Insulating Cover |
Provides overcurrent protection for high-capacity circuits. |
£79.13 |
Amazon.co.uk |
| ECO-WORTHY Battery Cables Set |
2/0 AWG cables suitable for high-current connections between battery and inverter. |
£18.99 |
Amazon.co.uk |
Total Estimated Cost: £1,268.11
Note: Prices are approximate and may vary based on availability and shipping.
🛠️ Installation Notes
-
Inverter Installation: Mount the Victron Phoenix Smart Inverter close to your battery bank to minimize voltage drop. Ensure adequate ventilation around the inverter to prevent overheating.
-
Battery Bank: With a 100Ah LiFePO₄ battery, you can safely draw up to 100A continuously. However, running a 1750W air fryer at 12V draws approximately 145A (1750W ÷ 12V), which exceeds the continuous discharge rating of a single 100Ah battery. Therefore, it's advisable to use two 100Ah batteries in parallel to handle the load safely.
-
Fusing: Install the Class T fuse block within 18 inches (45 cm) of the battery's positive terminal. This fuse protects against short circuits and overcurrent situations.
-
Cabling: Use 2/0 AWG cables for connections between the battery bank and inverter to handle high current loads with minimal voltage drop. Ensure all connections are secure and terminals are properly crimped.
🛡️ Safety Considerations
-
Ventilation: Ensure that the inverter and battery compartment are well-ventilated to dissipate heat effectively.
-
Overcurrent Protection: Always use appropriately rated fuses or circuit breakers to protect wiring and components from overcurrent.
-
Regular Maintenance: Periodically check all connections for tightness and signs of corrosion. Inspect cables for wear or damage.
📄 Summary
To safely and effectively run a Ninja Air Fryer off-grid in your campervan, consider the following setup:
-
Inverter: Victron Phoenix Smart Inverter 12/2000 – £559.99
-
Battery Bank: 2x Victron Energy Lithium Battery Smart 12.8V 100Ah – £1,220.00
-
Fusing: Blue Sea 5502100 Class T Fuse Block – £79.13
-
Cabling: ECO-WORTHY 2/0 AWG Battery Cables Set – £18.99
Total Estimated Cost: £1,878.11
*Note: This total includes two batteries to handle the high current draw of the air fryer safely.
So let’s return back to our initial install before we mention an air fryer, when we start with just looking for a budget install. We will then include some final prices and information.
🔌 Initial Off-Grid System Components & Pricing
| Component |
Description |
Price (GBP) |
Purchase Link |
| Battery |
Victron LiFePO₄ 12.8V 100Ah Smart Battery |
£499.00 |
Quality Source Ltd |
| Solar Charge Controller |
Victron SmartSolar MPPT 100/30 with Bluetooth |
£99.99 |
Wired Campers |
| DC-DC Charger |
Victron Orion-Tr Smart 12/12-30A Non-Isolated DC-DC Charger |
£168.49 |
12 Volt Planet |
| Shore Power Charger |
Victron Blue Smart IP22 Charger 12V/30A |
£167.95 |
Cactus Nav |
| Battery Monitor |
Victron SmartShunt 500A/50mV |
£79.99 |
Wired Campers |
Total Estimated Cost: £1,015.42
Note: Prices are approximate and may vary based on availability and shipping.
🧰 Additional Components & Materials
To complete the installation, you'll need the following:
🛡️ Safety & Compliance
-
Fusing: Install appropriate fuses close to the battery on all positive circuits.
-
Isolation: Include a main battery disconnect switch for safety.
-
Grounding: Ensure all components are properly grounded to the vehicle chassis.
-
Compliance: Adhere to UK electrical regulations and standards for vehicle conversions.
📄 Summary
Initial Off-Grid Campervan Electrical System with Victron Components
-
Battery Bank: 1x 100Ah LiFePO₄; expandable.
-
Solar Charging: Victron SmartSolar MPPT 100/30 with 200W panel.
-
Alternator Charging: Victron Orion-Tr Smart 12/12-30A DC-DC charger.
-
Shore Power Charging: Victron Blue Smart IP22 12V/30A charger.
-
Battery Monitoring: Victron SmartShunt 500A.
-
Safety: Proper fusing, main disconnect, and grounding.
-
Expandability: Designed for easy addition of batteries, solar panels, and inverter.
Total Estimated Cost: £1,015.42 (excluding solar panel and additional materials)