🛠️ Camper Van Hot Water System Resources & Product Links
information provided is helped with Van Build Buddy
Explore these trusted resources for installing and maintaining your Surecal calorifier and enhancing your camper van water heating setup:
Ensuring a reliable hot water supply is essential for comfort during your campervan adventures. The Surecal calorifier offers an efficient solution, utilising engine heat and optional electric immersion to provide hot water on demand. This guide will walk you through the installation process, explain each component's role, and discuss the system's advantages and potential drawbacks. We dig deep in to other potentials with youtube videos for loads of information. Ive learned alot from creating this. I hope You Enjoy.
🛠️ Step-by-Step Installation Instructions
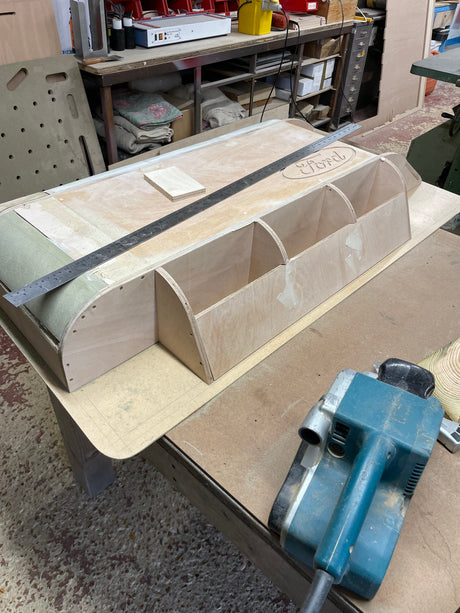
1. Selecting a Suitable Location
- Placement: Choose a location that allows easy access for future servicing and is protected from potential damage.
- Securing the Unit: Position the calorifier and secure it using the four fixing feet provided. Install information
2. Thermostatic Mixing Valve Adjustment
- Purpose: Controls the temperature of the outgoing hot water.
- Adjustment: Turn the valve anti-clockwise to set the maximum temperature to 65°C. Turning it fully clockwise sets it to 30°C.
3. Plumbing Connections
- Hot Water Outlet: Connect to the topmost fitting (12 o'clock position) using sometimes 12mm & 15mm push-fit plastic plumbing (e.g., Hep2O or Speedfit). The colour match Blue and Red is the ultimate.
- Cold Water Inlet: Connect to the lowest fitting (6 o'clock position) to supply cold water under pump pressure.
4. Engine Coil Connections
- Purpose: Utilizes engine heat to warm the water.
- Connection: Use heater hose from the engine, pass over the barbed fittings on the coil, and secure with jubilee clips.
5. Pressure Release Valve (PRV)
- Function: Relieves excess pressure from the system.
- Installation: Pipe the outlet of the PRV to a safe discharge point, such as the bilge. The PRV can also serve as a manual drain when held open.
6. Immersion Heater (Optional)
- Installation: Follow the specific 'Immersion Connection Instructions' provided with the unit.
7. Expansion Bottle Installation
- Purpose: Accommodates the expansion of hot water, preventing pressure build-up.
- Placement: Install on the hot water supply line between the thermostatic mixer valve and the first outlet (e.g., tap or shower).
8. Winterisation
- Procedure: If there's a risk of freezing, drain the calorifier as part of your regular winterization or pre-storage maintenance routine.
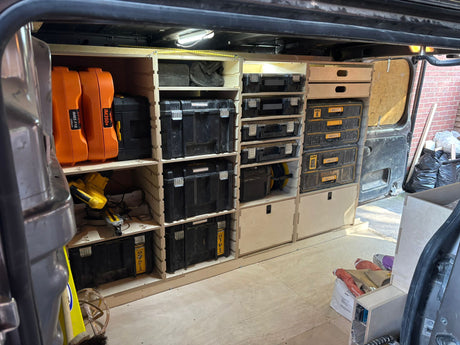
🧩 Understanding System Components
- Calorifier: A tank that heats water using engine heat or an electric immersion heater.
- Thermostatic Mixing Valve: Blends hot and cold water to deliver water at a safe, consistent temperature.
- Pressure Release Valve (PRV): Prevents excessive pressure build-up by releasing water when necessary.
- Expansion Bottle: Absorbs the expansion of heated water, maintaining system pressure.
- Cold Water Tank: Stores fresh water, supplying the system via a pump.
- Water Pump: Pressurises the water system, ensuring consistent flow to outlets.
-
🔵 Accumulator Tank
An accumulator tank is a small, pressurised vessel that sits in the water line after your pump. It stores a reserve of pressurised water, helping to smooth out water flow, reduce pump cycling, and protect the system from pressure spikes, especially when used alongside a Calorifier. It’s particularly useful for maintaining stable pressure and preventing the pressure relief valve (PRV) from discharging unnecessarily due to thermal expansion.
✅ Clorifier Pros and Potential Cons
Pros:
- Efficient Heating: Utilises existing engine heat, reducing energy consumption.
- Dual Heating Options: Offers flexibility with both engine and electric heating methods.
- Compact Design: Ideal for space-constrained environments like camper vans.
Potential Cons:
- Installation Complexity: Requires integration with engine cooling systems and electrical wiring.
- Maintenance Needs: Regular checks and winterisation are necessary to prevent damage.
- Initial Cost: Higher upfront investment compared to simpler water heating solutions.
🚰 Are Water Tanks Pressurised in Camper Van Systems?
❌ No – the tanks themselves are not pressurised.
- Fresh water tanks are atmospheric (vented), typically sitting under a bench or bed.
- Pressure in the system comes from the water pump, not the tank itself.
💡 How Pressure Is Created
- A 12V diaphragm pump draws water from the tank and pressurises the lines.
- An accumulator or expansion vessel can help maintain consistent pressure.
- Calorifiers may build internal pressure as water heats, managed by a PRV and expansion bottle.
✅ Pros of Non-Pressurized Tanks
- Simpler & Safer: No risk of over-pressurisation or tank rupture.
- Easier Installation: No need for pressure-rated fittings or tanks.
- Flexibility: Can be mounted in a variety of orientations.
⚠️ Cons
- Relies on Pump: If pump fails, no water flow.
- Requires Vents: Must allow air in as water is drawn out.
🧰 Must-Have Considerations
- Use a Good Pump: Choose a pressure-regulated diaphragm pump (e.g., Shurflo or Whale).
- Include an Accumulator: Helps maintain pressure and smooth flow.
- Secure Venting: Install a proper tank vent to prevent vacuum lock.
- Check Fittings: Use WRAS-approved or food-grade components.
- Monitor Pressure: Match your system's components (e.g., expansion bottle, PRV) to the pump's PSI rating.
🔗 Additional Resources
- Surecal Horizontal Calorifier Connection Instructions: surejust.co.uk
- Surejust Product Range: Surejust Official Website
- Amazon Search for Calorifiers: Amazon UK - Calorifiers
- Van Build Buddy “ One place, Let’s build together”
Huge thank you to UrbanArkOverland for such a great and informative Video.
📝 Summary
Installing a Surecal calorifier enhances your camper van's comfort by providing a reliable hot water supply. By understanding each component's role and following the installation steps carefully, you can ensure a safe and efficient system. Regular maintenance and proper winterisation will prolong the system's lifespan, offering you warm water wherever your travels take you.
If you need further assistance or have specific questions about your camper van setup, feel free to ask! Or check out our link below for our Van Build Buddy


🔄 Alternative Option: Hydronic Heating Systems, Upgrades & Add ons
For those looking for an all-in-one heating and hot water solution, hydronic heating systems offer a powerful and efficient alternative to traditional calorifier setups. These systems use a diesel-powered boiler (like Webasto or Eberspacher) to heat a glycol-water mix, which is then circulated through heat exchangers for space heating and optionally through a calorifier coil to heat domestic water.
Hydronic systems are especially well-suited for cold climate travel or year-round living, offering quiet, zoned heating with better freeze protection. However, they do come with a higher installation complexity and cost compared to engine-based calorifiers.
Ideal for: campers who need reliable heating off-grid, want to reduce reliance on driving for hot water, or prefer a single integrated heating solution.
🔥 Main Differences: Calorifier vs Hydronic Heating
|
Feature |
Surecal Calorifier System |
Hydronic Heating System |
|
Purpose |
Primarily for hot water |
Provides both space heating and hot water |
|
Heat Source |
Engine heat or electric immersion |
Diesel heater (e.g. Webasto, Eberspacher), sometimes 240V element |
|
System Type |
Passive – uses engine coolant loop |
Active – circulates heated liquid through pipes and radiators |
|
Components |
Tank, coil, PRV, expansion bottle |
Boiler, circulation pump, heat exchangers, radiators, calorifier (optional) |
|
Installation Complexity |
Medium – integrates into engine and plumbing |
High – multiple zones, pumps, insulated pipe runs |
|
Cost |
£300–£800 typical |
£1,200–£4,000+ depending on system |
|
Heating |
Indirect – heats water only |
Direct – heats air (via rads or fan coils) and water |
|
Winter Use |
Needs draining or antifreeze if inactive |
Often uses glycol mix – safer in freezing conditions |
🧩 When to Use Which?
Use a Calorifier if:
- You want hot water from the engine while driving.
- You already have a diesel air heater for space heating.
- Budget or space is limited.
Choose a Hydronic System if:
- You want central heating and hot water in one.
- You’ll camp in cold climates often.
- You want to heat while stationary using diesel.
🔧 Example Hydronic Systems
- Webasto Thermo Top Evo + Isotemp calorifier
- Eberspacher Hydronic S3
- Truma Combi 4/6 (technically a hybrid unit)
 |
 |

|
Huge thank you to FreedonStrider for such a great and informative Video.
- Surecal Horizontal Calorifier Connection Instructions – Surejust
- Surejust Official Website – Product Range
- Amazon UK – Calorifier Search Results
- Van Build Buddy – Campervan Build Help
🔗 How to Connect a Webasto Thermo Top Evo to a Surecal Calorifier
🧩 System Overview:
- Webasto Thermo Top Evo acts as the heat source.
- It heats a glycol-water mix.
- That heated mix is pumped through a coil inside the Surecal calorifier, transferring heat to the domestic water.
- Optionally, the system can also feed radiators or fan matrix units for space heating.
🔧 Basic Installation Layout:
Key Components:
- ✅ Webasto Thermo Top Evo diesel boiler
- ✅ Surecal horizontal calorifier with internal heating coil
- ✅ Expansion vessel
- ✅ Circulation pump (e.g. Webasto or Surejust-supplied)
- ✅ Header tank
- ✅ Insulated 15–22mm heater hose
- ✅ Isolation valves
- ✅ 12V controller or thermostat
🔄 Plumbing Steps:
- Mount the Webasto safely inside or under the van near the bulkhead or wheel arch.
- Route 2x heater hoses from the Webasto’s output to:
- Coil inlet on the calorifier
- Then return from the coil outlet back to the Webasto
- Insert a circulation pump in-line on the return loop.
- Add a header tank at the highest point in the loop.
- Top up with a glycol (antifreeze) mix, usually 30–50% depending on climate.
🔌 Electrical:
- Webasto connects to 12V power and its own control panel.
- Pump and controller may be wired separately or integrated depending on kit.
- Use a fused distribution point and relay where appropriate.
📌 Important Notes:
- ✅ The Surecal must have a second coil (or use its built-in single coil for the Webasto instead of engine loop).
- ✅ Ensure air bleed valves are installed at high points.
- ✅ Use marine-grade hose clamps and coolant-safe hose.
🛒 Recommended Products
- Webasto Thermo Top Evo Kit (Amazon)
- Surecal Calorifiers (Surejust)
- Isotemp or Surecal Expansion Tanks
✅ Summary
Yes, you can connect a Webasto Thermo Top Evo to the Surecal calorifier using the coil as a heat exchanger. It’s a high-end, flexible system that delivers both hot water and heating when properly plumbed and insulated.
Check out and a huge thank you to Hangin With The Hursts where he included a detailed video of just what it can do! This give ge a great understanding of everything we have spoke about.